Tuesday, March 24, 2009

OH boy, do I have my work cut out for me!!

I wandered up to the garden to take a look around last Thursday. It's a mess. Last fall, I ran out of time and energy to keep up with weeds and also to clean up after frost killed off everything. I did get a chance to get the last of the leeks out in November, and was rewarded with having our last batch of potato leek soup in January. But this is what it looks like now.


The relatively clean rows closest to you are the strawberry beds, except for the closest bed which is asparagus and some rhubarb. The deer have done a pretty good job of tromping in the mulch that was on the beds and eating a lot of the mulch pile in the bottom right corner. Beyond the strawberry beds is the area formerly home to beans, broccoli, lettuce, etc. etc.

These fences held up my cucumber plants last year. This area isn't too scary and most of the mulch is still in place.

My dad was cleaning out the barn and brought up a lot of old hay for me to use as mulch. Unfortunately, he brought it up last fall, so guess what... we've been feeding the deer all winter.

This picture of scat and prints supplies evidence of the local deer's favorite hangout. Most of the garden is covered with it. I guess in return for feeding them, I have to admit the deer have been providing fertilizer. :-P

Last year we got half of the deer fence in place. This spring we are finishing it! (NO MATTER WHAT!) Around the perimeter of the garden (which includes three 30 strips, each 250 feet long--one strip "rests" each year) we are putting 5 foot high welded wire fence. I know this alone will do little to deter these jumpers, but will do a lot to keep the coon out come corn season. About 4-5 foot outside the welded wire fence will be 2 strands of electric at 6 inches and 3 feet. In my experiences (note the mulch left relatively untouched in between the cucumber fences) and research, I have discovered that deer can jump amazing vertical heights, BUT they don't like to jump into narrow spaces, or into an area that they are uncertain of. My hopes are that the electric wire will make them think twice about clearing a 5 foot fence that is placed 4 feet in front of them. If that doesn't take care of it, then we will attach posts to the top of our wooden posts and string electric above the welded wire. We will also attach shiny things to blow around in the wind. Seem extreme??? Well, this is war, folks. This is all-out war! I have lost too many strawberry plants to count; the evil creatures have been known to stomp on ripe watermelons to eat out the insides, cleaned off the outer cuke fences of vines, and bit the centers out of cabbages and lettuces. They dearly LOVE sugar snap peas and will nose through the vines finding every last one. So, the deer MUST be stopped.

So, as soon as it dries out a bit more, I know where I'll be spending most of my time. I better head to the store to get a few more pairs of work gloves!


Monday, March 23, 2009

Garden Journal Notes No. 2

March 10--Pot on to 2" blocks: Lipstick and Dulce peppers.
Pot on to small pots: Amish Paste Tomatoes

March 11--Pot on to small pots: Tomatillo, Amish Paste Tomato, Rutgers Tomato, Brandywine Tomato.
Pot to 2" blocks: Kin of the North and New Ace Peppers
Cherry tomatoes and Okra up that was planted on March 3!

March 12: Planted Petunias and Strawflowers in Jiffy Peat Pellets (1 tray of each, Sue gave me "Jiffy Greenhouse" kit). Started on heat mats.

March 20: most of Petunias and Strawflowers up. Such tiny plants!!!

March 21: Potted on Sunray to 3" pots

March 22: Potted on New Girl, Sweet Olive, and Jellybean tomatoes. Moved onions and leeks to coldframe. (Had previously put them out for an overnight, but had brought back in with threat of temps in the 20's.) Today's temps were around 55 for a high. Supposed to have lows in the 40's tonight and tomorrow night. Upper 20's predicted for mid-week for lows with snow showers. Probably will have to get insulation to cover the coldframe.

Sunday, March 22, 2009

Catching Up!

Well! It seems I'm being heckled into updating my blog! LOL! It's nice to know it's being read... thanks, Dennis, for the kick in the pants. (And you better be glad I have a great sense of humor! LOL)

A lot HAS been happening garden-wise around here. But it's all happening IN my house! Specifically, in the sunroom, which is normally the kids art area. OOPS! Well, thankfully the weather has been pretty nice, so the kids have been outside quite a bit and haven't missed using their area TOO much. Plus, they get to play in water and dirt with Mom. What could be better?!


The seed-starting operation has expanded to a potting-on operation, which means that everything takes a lot more room. Currently, we have the original shelving unit which holds 8 flats, and have added a 8 foot table with light setup. The PVC tubes are situated so that we have lower or heighten the lights as the plants grow and are potted on. It may not look like much but it is very useful. My best friend's husband built it to be placed on top of a pool table. Well, my table is not that strong, so we put it on the floor so that it straddles the table. I had thought that I might commandeer the ping pong table for plants, but that was met with MUCH opposition from the family. :-)You can see that the tomatoes are really taking off. The peppers are quickly catching up, too! I was gone all day Friday. When I was checking that night to see if they needed water, I swear the peppers had all grown at least 2 LARGE leaves since that AM. Wow! Almost all of the tomatoes have been potted on now. I put as many as I could in 3 in pots, then went to 4 in after I ran out of the smaller ones. They really take up a lot of room, and every bit of space under the lights is being used right now. The temps have been in the 50's/60's the last few days, with nighttime temps in the upper 30's to 40's, so I moved the onions and leeks out to the coldframe. I'm hoping the weather will hold and continue to get warmer so I can consider moving the peppers out there when they are ready for larger living quarters.

Speaking of peppers... here's how the potting-on went for them. They were started in the microblocks and since that was mainly for utilizing my heat mats efficiently, they grow out of the tiny blocks quickly. Time to step up to the 2 inch blocks. I put the microblock inserts in the blocker--simply popped out the seeds indents and screwed these in with the screw and washer they come with. Pretty easy.

Then on to making the blocks. Got the soil moist and away we go! I can fit 50 2 inch blocks in a flat. Ready for plants!I started getting the peppers potted-on on March 10. They have since all grown at least 2 true leaves, some as many as 4 large leaves. In a few more weeks, they will be ready for lots more space--probably 4 inch round pots.

I mentioned that the onions and leeks have moved outside. So, here are a few pictures of the coldframe setup:

This coldframe, and it's sister, were made from old wood hubbie Mike salvaged from an old deck and old storm windows from my parents' house. We prop open the windows for ventilation with just odd pieces of scrap wood. Very low-tech. :-) What matters is that it warms up nicely inside and protects the plants. I put a thermometer inside and it has been getting up to 70 in the sun, at which point I prop it open so I don't bake my plants. (I know from experience that it can heat up quickly to over 100 degrees in the coldframe even on a 50 degree sunny day!) The coldframe takes a lot of monitoring, and I hope to get a wireless thermometer for it (and to be used in the greenhouse once it is up). Then I can easily monitor the temps while I'm... baking bread or teaching Emily or even updating my blog!

I figure the leeks and onions will be good down to 30 degrees. If it threatens to get much colder than that at night, I will put a small ceramic heater in there and have it kick in at 40. Once the peppers are in the coldframe, I will keep it closer to 70 at all times. During sunny days that won't be a problem. It's the nights and cold rainy spring days that present problems. In the past I have succesfully placed a sheet of foam insulation over the frame at night to hold in the heat. It works amazingly well!

Next up will be pictures of the work cut out for me this spring OUTSIDE. Right now I'm really regretting not getting out to the garden to clean things up before the snow hit. Ah well! Live and learn!

Wednesday, March 4, 2009

Garden Journal Notes

Garden journal notes (before I forget to write them down!):

Feb. 25: seeded Brandywine, Jellybean, New Girl, Sweet Olive, Amish Paste Tomatoes; Dulce Jalapeno, King of the North, Lipstick Peppers (all peppers and tomatoes in micro-blocks, except 1/2 the Brandywine and all Jellybean and New Girl planted in cells. All tomatoes and peppers on heat mats);
King Richard Leeks; Yellow of Parma and Expression Onion (planted in rectangles);
Evergreen Scallions (planted in bunches of 10 in 2-in blocks.

March 2: all tomatoes up. Almost 100% germination. Roots visible on many peppers.

March 3: seeded Golden Nugget and Sun Gold tomatoes; Pintung Long Eggplant (all in cells); Sunray, New Ace, and Valencia Peppers, Basil, Parsley, and Tomatillos in microblocks on heat mat; Lincoln Leeks in rectangles.
Tiny spears of Yellow of Parma onion and Evergreen scallions starting to make an appearance.

March 4: many peppers up, King Richard Leeks poking up a few spears.

Tuesday, March 3, 2009

Soil blocks

A few years ago I was reading Eliot Coleman's book The New Organic Grower and was intrigued by his discussion of soil blockers. I always seemed to have the worst time keeping enough cell packs on hand for starting my seeds and was never thoroughly happy with them. Soil blocks seemed like the sustainable solution to this problem. Not only would I not have tons of those stupid little broken plastic 6-packs after their use, but the soil blocks provided another benefit--healthier roots. The roots will fill the block, but when reaching the edge (air) will stop and wait to be potted on, unlike in the plugs or pots where the roots will wind themselves around and become a matted rootbound mess. Also, the roots are not disturbed hardly at all when potting on since you just pick up the block and set it in the next sized block or in your pot. So, I ordered my two soil blockers from Fedco/Organic Growers Supply. The all-metal one creates 4 2-inch blocks, while the micro-blocker makes 20 little blocks in a 3"x4" area. The metal blocker has inserts that will make micro-block-sized indents for potting on the micro-blocks.


The nifty blue cushion did not come with the micro-blocker. It is the invention of my friend who got sick of getting scraped-up knuckles when she used it. It works wonderfully!


So you start with potting soil or starting mix that is wet enough to clump together. I prefer Vermont Compost's Fort Vee potting soil. I have also used Eliot Coleman's potting soil recipe, with great results, but it can be a hassle to get all the ingredients and mix them well enough. I did consider borrowing my dad's cement mixer for mixing... that would've worked!

You press the blocker into the wet soil firmly to fill the blocks. I have found that I need to press the soil into the micro-blocker's holes with my fingers to evenly fill it or the outside ones aren't packed well enough.

Then you pop the blocks out into a tray. You pull up on the handle and the spring-action ejects the blocks. This part can be a little tricky, but after a couple tries you get the hang of it! Each block has a little indent in it to hold the seeds. Obviously since the blocks are verrrry little, they work best with small seeds. I use them for my tomatoes and peppers, since I put them on a warming mat and the mini-blocks are easy to keep warm and speed germination. I also use them for a lot of small-seeded herbs and lettuce.

Here is a full tray of micro-blocks all seeded. The larger seeds are peppers and the small ones are tomatoes. As you can see, a tray holds a LOT of micro-blocks. Soon after the seeds germinate, they run out of space in their micro-block and need to be potted on to the 2-in blocks. The advantage here, though, is that I can get a lot of seeds started with only using 3 warming mats. After they have germinated, most plants are content at room temperature or slightly warmer, so don't really need the warming mat.

After seeding, I mist the top of the blocks and use a clear dome to keep in the moisture. I check daily and mist if the blocks seem to be drying out.

In the picture above, you can see the seedlings starting to put out roots, just 2 days after planting! And interestingly enough, I learned from
The New Organic Grower that not all seeds need to be covered to germinate. Onion family seeds do prefer the dark for germination. So they should be covered with dirt or, if not coverering them, started in a dark room.


Ta-DA!! Little tomato plants just 5 days after planting. (I love time-stamps on pictures!!) These will need to be moved to 2-in blocks soon. The peppers you can see are starting... they are a bit slower germinators.


This is what the 2-inch blocks look like. I can fit 50 in a tray. These have the regular seed indent in them (not the square for potting on micro-blocks). I use them for onions, scallions (in bunches--just put 12 seeds in each block and they are pre-bunched!), and any larger seeds--cukes, watermelon, broccoli, cabbage, nasturtiums, okra, etc. These blocks are quite a bit easier to make than the micro-blocks. There is a 20-count blocker for these size blocks that I think would be a blast to have, but the price-tag is a bit too much for this frugal gardener. There is also a single 4 inch blocker available, but again, the price tag is a bit much and I have lots of 4-6 in pots, so I use those.


I don't use the soil blocks for all my plants. This year I am starting my leeks in 2X3 inch rectanglar trays. A friend who grows perennials for market had gotten a bunch of the trays and decided they didn't work for what she wanted, so she passed them on to me. I had not considered growing leeks in bunches until I saw them sold that way at a local nursery. They grow together, then you simply separate them when planting in the garden. I am planting some onions in the same manner, but most of my onions I grow in groups of 4 in the soil blocks. This was another idea from Coleman's book, and it has worked very well for me. I also use cell-packs (I reuse everything I can--so I have quite a few from nursery flowers) for some things, mostly marigolds and other flower starts.

Here is my current setup for my early starts. I can fit 8 trays on here (and after a planting spree today, it is full). When I start potting on the tomatoes, I will have to expand to another table with a light system set up over that. I'm hoping that the snow will go away and by mid-April I can start using the cold-frame (though that will have to be with a backup heater and insulated cover for cold nights). By that time, the plants are starting to take over the house, and every spare table area is covered in greenery!

I really enjoy this early chance to play in the dirt. I even get to make mud!!! Wheee!

Monday, March 2, 2009

Starting seeds!

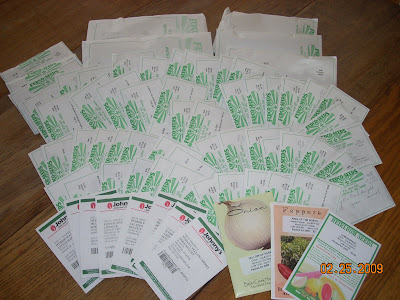
The seeds came, and now we can get started! I like to have my leeks and onions planted early February, but late Feb. had to suffice. On Feb. 25 my two youngest kids helped to get some seeds planted. We planted most of our onions, and about half the tomato and peppers. The rest will (hopefully) get planted tomorrow, along with a second planting of scallions.

It's lots of fun to play in the dirt! Here Emi is filling a cell tray for tomatoes and Elias is filling small containers for onions. Emily loves helping with the seeds. Elias loves playing in the dirt!